Pages

Our Featured Items for Sale on Etsy

Thursday, December 10, 2015

Restoration of a 1937 Emerson Mod. 149 Two Band Radio

This project was started December 2015.  It was evident from the start that this would be a challenging restoration.  The radio was completely dead, the chassis pretty rusty, and lots of deterioration evident in the wiring.

The 3 piece case is bakelite and was originally unpainted dark brown.  This model came in two styles: brown, like this one, and a black model with a cream colored plaskon center. Although the paint job looks good in the picture, it's not that great...just a spray can job with no attempt to rub it out or otherwise make it look nice.  Also, I don't like that it is a 'fantasy' color, never available on this radio. Also, the celluloid dial face is broken and the foil number plate wrinkled.  I have a new dial cover so the only issue will be repair of the dial face.

One of the decision to be made is to strip the case and return it to its original single color, or, using period appropriate colors, paint it to emulate the fancier black and cream model.  I'll let the radio decide as we proceed with bringing life to it.


December 10, 2015

Examination of the chassis has been done. The tubes have been tested showing the rectifier to be dead and the power tube weak.  I replaced the rectifier and the tubes now all light and there is some sound in the speaker but no reception. Some significant oscillation indicate shielding issues.  The next step will be to test the various stages.  There is a schematic available in my Rider Troubleshooting Manual Vol VIII. These are harder to work with than the Sam's Photofacts because the author assumes the reader knows what he's doing. For me, that means I'll have to create my own circuit diagrams to figure out the resistances and pin voltages. Oh well...I'll eat some brain food and give it a go....

Tuesday, July 14, 2015

Restoration of a 1947 Black Emerson Moderne

Emerson Mod 522 Ebony AM Table Radio ~ c. 1947
This is a post-war Emerson Model 522 which is a very popular collectible AM table radio. It was manufactured for the 1947 model year and featured unique styling in a heavy duty bakelite case with a clear plastic dial lens. The Model 522 was available only in an unpainted ebony bakelite case. The dial is lighted by a small bulb centered above the dial lens and the numbers and pointer were designed so that each number on the dial looks as if it is individually lit.

The mid 1940's to early 1950's incorporated a design style known as 'Moderne' and was characterized by modern but somewhat bulbous elements.  Examples of Moderne styling were very evident in the look of the 1950 and 1951 Chrysler and General Motors automobiles as well as much of the dark wood furniture of the period.  While the Moderne school of design was short-lived (primarily because it was fundamentally ugly), a few successes such as this Loewy inspired radio survived and viewed in retrospect are really quite beautiful and collectible.

The Emerson here was acquired a few months ago and in as-found original condition with the possible exception of the power cord having been replaced. In order to complete the circuit for testing, I also had to replace the burned out pilot light. It is an early model as the chassis uses the older Loctal type tubes. Later 511's and 522's incorporated the miniature tubes.
The case, front grill and tuning lens

Tubular cap upper left
A careful application of minimal electrical power to the circuitry showed that there were lots of problems.  The radio played but with a loud hum, a serious case of motor-boating and very weak reception.  The obvious villain appeared to be the filter capacitor (the big tubular thing in the upper left in the above picture). In addition there were a number of very iffy-looking other paper capacitors that no doubt are contributing to the several performance quality issues. Further evaluation would include checking both the capacitors and resistors to make sure they are within stated tolerances.

I have a schematic for this radio, so the next step was to test the tube pin resistances and pin voltages and compare them to the published specs.  In addition, I wanted to identify those pins that had anomalies in both resistance and voltage as that would be a great clue as to where in the circuit failed or failing components could be located. Below are my sheets showing the initial readings. Those highlighted in pink were out of spec.


Initial Resistance Readings

Initial Pin Voltage Readings
+ highlighted are pins with anomalies
in resistance & voltage
Cosmetically, the radio wasn't too bad.  The case was structurally sound with no cracks or damage and the original knobs, grill, dial lens and bottom plate were all there and in decent but dirty condition. The finish on the case seemed a little dull and given that it's bakelite, restoring shine could be problematic since bakelite can't be sanded and refinished like hard plastics. However, I felt there was good possibility that a good cleaning could bring good results.  The grill might have to be repainted for which I generally use a period appropriate color and paint type.

The radio was taken apart and the process of evaluating the condition of the cosmetics and the electrical components begun. The original power cord was in good shape but had been improperly spliced into the circuit so I completed the repair to correct that and now it is properly installed.

The above analysis strongly indicated that most of the old paper and wax capacitors were at best in marginal to failed condition and because of that,  there was a good chance some of the related resistors had been stressed and were performing outside of spec.  I decided to replace all the affected capacitors and those resistors that could potentially fail. Particular attention was paid to the high value resistors as they tend to vary greatly as they age.

Below is a picture of the (almost) completed work on the chassis...one high value resistor has to be changed and I'm waiting for a supplies order to arrive so I can do that.

New components
The radio now plays really well with strong volume and surprisingly sensitive tuning.  The tube pin voltages are now pretty much in spec except those affected by R21, which will be replaced as soon as the supplies order arrives.

Below is the Voltage Measurement chart updated to this point.  The highlighted numbers are the correlated cap and resistor anomalous readings that should resolve after R21 is replaced.

Updated Pin Voltages

While waiting for parts, I turned to the cosmetics.  The case was thoroughly cleaned with a very gentle solution of dish washing detergent and soft bristle brush.  Bakelite is not like other plastics; you cannot "polish" a dull case as the original shine was baked on and cannot be restored if removed. There are some methods for emulating a bakelite shine, but luckily, I did not have to employ them here.  As it turned out, this case is really nice and the shine was preserved as a soft ebony glow which is what you want with unpainted bakelite. After cleaning and removing a couple of old paint spots, I waxed it with a carnuba based automobile wax. 

The front metal grill was in pretty good shape and I touched up a couple of places that were stained. The dial lens was a little hazy so I used a plastic cleaning compound to clear it up.  The yellow tint is patina and a function of the radio being 77 years old. I don't try to rub out the tint as I think it makes the radio look original and adds to the character. Further, it in no way affects the dial light's ability to individually illuminate the station numbers. 

The picture at the beginning of this article is the finished radio.


©2015 David Simons Big River Mercantile

Wednesday, July 8, 2015

Feedback from our customers

Deco Era Silk Parasol
"This is sublime the most beautiful umbrella I have ever owned"


Sunbeam Mixmaster Stand Mixer


"This item is fabulous, just as described. The mixer is in beautiful condition and works wonderfully. The item arrived promptly and was packaged perfectly. I would not hesitate to purchase from this merchant again. Thank you!"


Victorian Crystal Perfume


"Really quick service. Especially with special shipping requirements. Thanks"


Truetone Radio


"Super rare radio, that sounds great and looks amazing. Extremely Happy with my purchase! Shipping was fast too!"


Depression Era Beater Jar


"packing, fast shipping, item just as described--- Wonderful shopping experience! Thank-you!"


Gold Nugget Pin


"Excellent transaction; beautiful item, fast shipping."

Instructions for the Care and Operation of Your Westinghouse Clock Radio


In the 1950's, there was hardly a home anywhere that didn't have a Westinghouse TV, refrigerator or radio. The 1957 model clock radio was unique in its 'TV' look, and was produced in more or less the same case for the next several years.

The 1957 model is the nicest with its gold tone clock background and really high quality hard plastic case.

These old radios, once restored are reliable and trouble free with just a minimum of care and maintenance.

CARE OF THE CASE

1. Do not place the radio in direct sunlight. Also, make sure the area where the radio is placed is open with plenty of ventilation.  Tube radios generate a fair amount of heat which needs space to dissipate.

2. The high gloss plastic case on this radio is easy to clean. Fingerprints, dust and dirt can easily be removed with a damp cloth and little mild dish washing detergent.  Be sure to rinse any soap residue off the case with a clean wet rag. 

3. DO NOT use any abrasives as they will scratch and damage the plastic. Likewise, solvents and citrus cleaners should not be used.

4. Radios restored in our shop will have a protective coat of carnuba wax applied.  This should last a long while &but if you want to wax it, use a high grade automotive wax with carnuba and NO CLEANERS. The process is identical to waxing a car; apply, let it dry and buff it off,

5. We have found that soft toothbrush is effective in cleaning all the grooves on the speaker side of the radio.  It also works for cleaning gunk out of the knurls on the tuning and volume knobs. If the knobs are incredibly dirty they can be pulled off and soaked in a solution of water and gentle dish detergent.

OPERATING THE RADIO

1. Plug it in and make sure the clock is running.  

2. To turn the radio on, rotate the right hand switch from the 'off' position to the 'on' position.  These are printed on the clock face and the knob has a molded pointer.  

3. The alarm function can be set with these knobs.  Once set, rotate the knob pointer to 'Radio Alarm'. The radio will then come on at the set time.

4. Although these radios can be played for long periods of time, remember they are 60 to 70 years old and are not designed to operate hour after hour.  We recommend no more than 6 hours a day, although it can remain plugged in so the clock operates.


© 2015 Big River Mercantile

Tuesday, July 7, 2015

Instructions for Use & Care of Your Truetone Mod. D2216B Table Radio


Truetone was the in-house brand name for radios made for Western Auto stores. These radios are known for their high quality construction, great sound and unique appearance.

The D2216 B featured is a tube type AM table radio housed in a rich brown bakelite case and manufactured in 1954.  Featuring a combination clock/alarm, this model was distinguished from other radios in its price range by its glass dial lenses, gold tone metal grill and high-end components. Design-wise, it has a traditional look that was popular in that period.

Your radio has been thoroughly evaluated and restored in our shop.  The case is original in all respects and the electrical components updated to assure reliable operation.  

Care and cleaning

1. The bakelite case has a high gloss finish baked on at the factory.  For that reason NEVER use abrasives of any kind or citrus based cleaning products as they will remove the gloss and it cannot be restored.  We recommend a periodic wipe-down of the case every month or so using a soft cloth dampened with plain water.  A microfiber cloth is ok to use.

For a more deep cleaning, use something like mild dishwasher detergent and a soft cloth.  Be sure to use a plain water cloth to remove any soap residue.

2, Generally, these bakelite cases need little or no maintenance other than the normal cleaning and dusting described above.  It is our practice to apply a protective coat of carnuba based wax prior to shipping.  A new coat of wax can be put on after a year or so, if you wish.  DO NOT use any of the wax/cleaners as these contain abrasives which will damage the finish.  We recommend a high quality automotive wax that contains carnuba wax. 

3.  Do not place your radio is direct sunlight as this can damage the bakelite.

4, The radio should be operated at least a couple hours a week. It's ok to leave it plugged in and the clock running.
  a) For their time, these clocks were really good. But they are mechanical and by today's standards cannot be expected to keep perfect time. The clock on this radio is very good and runs quietly. It needs no servicing.

Operating the radio

1. Plug in the radio and using the far left (as you face it) knob, turn it counter-clockwise to the 'on' position. After about 60 seconds, you will hear some light static or crackling in the speaker. 

2. Using the larger knob on the front of the radio, tune it to a station. When the station is loud and clear, the radio is tuned.  The smaller knob controls the volume.

3. The time is adjusted using the knurled knob on the back of the radio.

4. The alarm can be set to either go off as a 'buzz' or turn on the radio at a set time.  Set the time you want it to go off using the right hand clock knob.  When it is set, gently pull the knob out (toward you).  The alarm will then come on at the set time.  

5. There is a snooze knob on the bottom which when rotated, will turn the radio off for a few minutes. 

Our goal is to restore these old radios to as close to their original look and working condition as possible. For more information about our process, please see the article about Louie the old Zenith radio that was posted last year.

© 2015 Big River Mercantile

Sunday, February 16, 2014

The Restoration of Louie, the Zenith Clock Radio


Usually the old radios that find their way to my shop are just old radios; junk that no one else wants and they come in all sizes and shapes and condition. Housed in dirty, bug-infested cases with wiring that often looks like it was used by a rat lynch mob and then eaten, these pieces are usually just inanimate lumps of metal, plastic and wax.

That was my opinion until I started working with Louie, the Zenith radio.
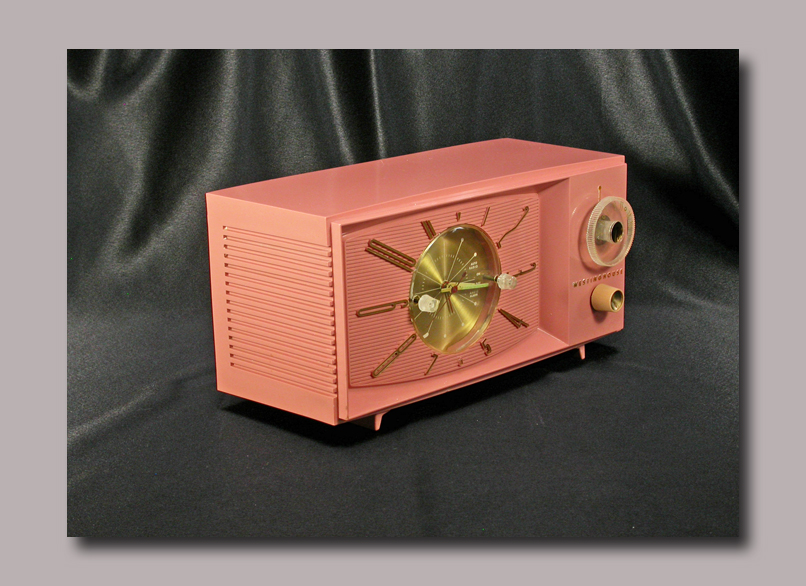
Louie, the 1953 Zenith Clock Radio

Unlike most radios that come into my shop, Louie emanated a certain joie de vivre and looked almost new from the moment he was acquired. Made in 1953 and housed in a beautiful teal green painted bakelite cabinet, this radio was always well cared for and loved for all of its 61 years. Sadly, after the passing of its owner, it had nowhere to go and none of the family cared to keep it. Louie caught my eye immediately at an estate sale. I really liked the color and the boxy early fifties design which reminded me of the DeSotos and Plymouth automobiles of that era. Although I have previously owned and restored the lesser 515 model, this was the first higher end 622 for me.

In the shop, I did a quick evaluation and found the radio worked really well, the clock ran quietly and kept good time, and all the knobs and functions were operational. However, knowing that if no work had been done to the radio over its life, the likelihood of incipient operational issues was high. As a matter of course, I always remove and examine all radio chassis to check the condition of the wiring, the insulation and the critical components. I also test the vacuum tubes with a mutual conductance tube tester. These checks are done no matter how great the radio looks and sounds. Like most things and people at 60+ years, things are starting to wear out and joints get creaky. So even though this radio sounded great, I had concerns about long-term reliability for whomever becomes Louie's new owner.

To start, the chassis was removed from the case. With clock radios, this is a more complex operation as the clock mechanism often has to be taken out in order to remove the chassis far enough from the case to be able to work on it. This is nerve-wracking because those little plastic knobs on the clock have to be removed. Often, a previous repair has resulted in them being glued onto the stems because years of wear and tear make them loose. If that has occurred, it's literally impossible to remove the knobs without some damage. For me, it's hard to tell until I try pulling them off; and, if they're glued, it is not uncommon for the knob to break. If that happens, it's almost impossible to find an exact match replacement. So with heart in hand, I gave them a yank...and off they came, no problemo. Removing the clock assembly after the knobs are off is no more than a matter of removing the hold down screws underneath the cardboard protective backing.

The clock mechanism removed
From the start, Louie made it clear that he didn't think I needed to be messing around with his innards. Since the radio hadn't been opened in over 60 years, I didn't agree. The screws holding the back on were stubbornly stuck as were the two large chassis screws on the bottom. An impatient person would have wrenched those things off, taking bits of bakelite with them and devil take the hindmost. But the cosmetics of this radio are so fine I did not want to chance damage. So with some chiding and negotiating and little WD 40, everything came apart nicely to expose the heart of this fine radio.

Underneath circuitry as found
The first thing to do was to run tests. Almost all American radios made since the 1920's have specs that someone has published. In the early years, it was the Rider manuals, and the Beitman manuals. Later, Sam's Photofact Folders were available. Voltages and resistances within the typical AA5 circuitry are essentially the same from one radio to the next and it's not hard to guess what they should be. But different manufacturers made tweaks to their circuits for specific models and that can sometimes make a difference in how the radio performs. For that reason, I like to find the schematic for the radio I'm restoring in order to most closely approximate the range of specs called for by the original maker. Testing Louie, then, was pretty easy as I had the schematic. With the manufacturer's information, I've devised a form on which I can record the optimal factory specs from the schematic, my test results prior to messing with the chassis and the final specs after I've fixed everything. This form helps me be consistent in the steps I go through in evaluating and renewing these old radios.
My voltage and resistance test form

As it turned out, Louie was not in perfect health. A number of capacitors and resistors had dried up and were not functioning within their required ranges. As a result, a lot of electrical stress was being placed on the vacuum tubes, a good indication that the radio would fail before too long. Clearly, some renovation was in order before putting Louie up for sale.

The necessary replacements were made, all of the solder joints re-soldered and wiring with old insulation replaced.  In addition, a new polarized power cord was added to further assure safety of operation.  With this done, the radio really, really sounded nice.  The volume range was high, the tuning sensitivity excellent and the full fidelity of the radio came booming through the large speaker. It was time to perform the final tests to make sure everything was operating within specifications.

Suddenly, while checking pin voltages on one of the tubes, there was a nasty flash as the pilot light blew out and everything went dead as a door nail.  What the heck had I done?  Was there a short? Were wires touching someplace? What?

There's always a sinking feeling when something like this happens.  Old radios can be mules when it comes to behaving properly. This radio, though, had not demonstrated bad behavior.  Every new component added a layer of quality to its operation, and it seemed as happy as I with the results. So what perverse trick was it playing?
Troubleshooting sheet - Zenith radio

Troubleshooting non-working radios is a study in logic and step by step reasoning.  Since I'm not great at that, I've devised a method and format for uncovering circuit faults. Luckily, in this instance, it turned out that one of the tubes had failed. This was fine since I was replacing all of them anyway.

As soon as the new tube was plugged in, everything returned to normal and the radio sang like a bird (but without the chirps and squeaks that can be annoying in anything but birds)

Now it was time to turn attention to the case.  The paint job after 61 years was in remarkable shape.  No renovation was needed; just cleaning.  The case was cleaned thoroughly inside and out and some of the inner insulating paper glued.  The gold colored grill was cleaned bar by bar and all the knobs done over with a toothbrush.  After it all dried, a coat of protective carnuba wax was applied to everything. The loudspeaker was treated with a special coating I've formulated to restore flexibility and add strength to the speaker paper.

All the components were re-set back in the case, the pointer knob aligned and the clock movement lubricated.
Case parts after cleaning and wax
Although Louie can't talk, he can certainly sing and there's no doubt that whenever you turn on his switch, he couldn't be happier. The warm tube driven AM sound is full and sharp and his little pilot light shines strong and steady for hours and hours.  His clock with the copper motor runs silently and keeps excellent time and all his alarm and radio on-off functions work as they did when he was new.

Through the mid-1950's, Zenith, one of the biggest name in electronics,  made some of the finest consumer radios available. They were colorful, innovative, great sounding and solidly designed pieces that could work anywhere with any decor. Zenith radios were the choice of many radio repairmen.  Louie, the Zenith radio is a great representative of those times.


© David Simons, Feb. 2014

Sunday, September 29, 2013

1975 Alaska Crafted Nugget Jewelry